2017年2月28日 星期二

樹莓派3 Raspberry Pi 3 - 使用 74HC595 Shift Registor 及 3 個 GPIO 控制 8 顆 LED


74HC595 接腳位的圖片說明:


Source: pimoroni.com


腳位編號名稱說明
1-7, 15Q0 ~ Q7輸出腳位
8GND接地
9Q7’序列輸出 (Serial Out)
10MRMaster Reset, 清除所有資料, 低電位有效
11SH_CPSHift register clock pin (Clock Pin)
12ST_CPSTorage register clock pin (Latch Pin)
13OEOutput Enable, 允許輸出,低電位有效 (Active low)
14DS序列資料輸入 (Serial data input)
16Vcc供應電壓


2017年2月25日 星期六

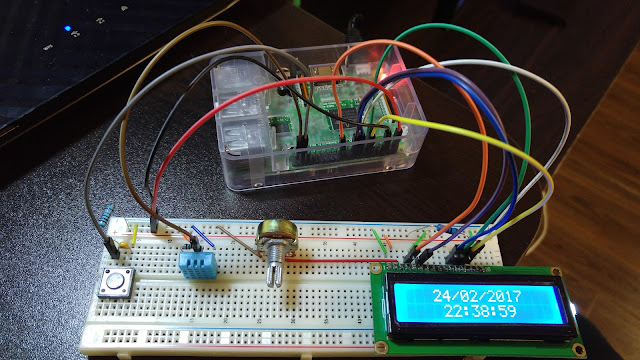
樹莓派3 LCD 資訊看板 Raspberry Pi 3 LCD Info Board


利用 16x2 LCD顯示屏偱環顯示:

1. 當前日期和時間
2. 樹莓派 IP 地址
3. 室內溫度和濕度
4. CPU溫度和使用
5. RAM使用情況
6. SD卡使用情況


電子零件:
  1. 麵包皮 x 1
  2. LCD 16x2 字元顯示屏 x 1
  3. 10K可變電阻 x 1
  4. DHT11 溫度、濕度感應器 x 1
  5. 開關按鈕 x 1
  6. 陶瓷電容 x 1
  7. 330Ω 電阻 x 1
  8. 10KΩ電阻 x 2
  9. 母對公、公對公杜邦線數條 

2017年2月22日 星期三

使用樹莓派3 (Raspberry Pi 3) 作為 Wifi 熱點


Source:
https://frillip.com/using-your-raspberry-pi-3-as-a-wifi-access-point-with-hostapd/

Packages

The first step is to install the required packages: sudo apt-get install dnsmasq hostapd
I'll go into a little detail about the two:
  • hostapd - This is the package that allows you to use the built in WiFi as an access point
  • dnsmasq - This is a combined DHCP and DNS server that's very easy to configure

Configure your interfaces

The first thing you'll need to do is to configure your wlan0 interface with a static IP.
If you're connected to the Pi via WiFi, connect via ethernet/serial/keyboard first.